Introduction: The Critical Importance of Root Passes
The root pass is the foundation of any multi-pass weld, representing the first layer that joins the base materials together at their root surface. In pressure vessels, pipelines, and critical structural applications, the root pass quality determines the weld's integrity, strength, and service life. A defective root pass cannot be corrected by subsequent fill and cap passes - it must be right from the start.
TIG welding is the preferred process for root passes in critical applications due to its precise control, excellent penetration characteristics, and ability to produce clean, defect-free welds. Whether you're welding pipe for the oil and gas industry, fabricating pressure vessels, or working on high-purity systems, mastering root pass techniques is essential for professional welding.
This comprehensive guide explores the techniques, equipment, and strategies needed to consistently produce perfect root passes in any application.
Understanding Root Pass Fundamentals
What Makes Root Passes Critical
Root passes face unique challenges that subsequent passes don't encounter:
Single-Sided Access: Root passes often must be made from one side only, with no access to the back side for cleaning or repair.
Complete Penetration Required: The root pass must achieve 100% penetration through the joint thickness while avoiding excessive reinforcement.
Back Side Exposure: The root pass back side is exposed to the atmosphere, making oxidation and contamination major concerns.
No Repair Possible: Defects in the root pass often require complete removal and re-welding, making first-time quality essential.
Code Requirements: Many applications have strict code requirements for root pass appearance, penetration, and testing.
Types of Root Pass Joints
Different joint configurations require different root pass approaches:
Open Root Butt Joints:
- No backing material
- Complete penetration required
- Most challenging configuration
- Common in pipe welding
Backing Bar Joints:
- Copper or ceramic backing supports the root
- Allows higher amperage
- Produces consistent root reinforcement
- Common in plate welding
Consumable Insert Joints:
- Pre-placed filler material at the root
- Ensures consistent root reinforcement
- Used in critical applications
- Requires precise fit-up
J-Groove and U-Groove Joints:
- Provide better root access
- Allow larger root openings
- Reduce welding volume
- Common in thick materials
Equipment and Setup for Root Passes
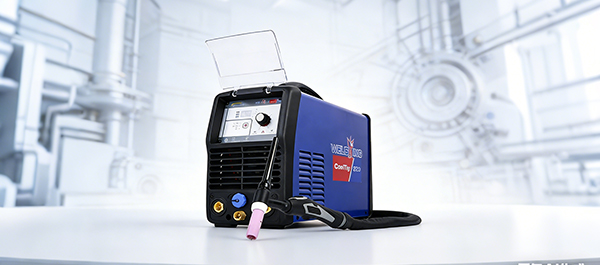
Power Source Requirements
Root pass welding demands precise power control:
Essential Features:
- High-frequency start for arc initiation without contamination
- Remote amperage control (foot pedal or fingertip)
- Low amperage capability (10 amps minimum)
- Stable arc characteristics at low current
- Pulse welding capability (highly recommended)
Pulse Welding Advantages:
- Reduced heat input prevents burn-through
- Better control in open root applications
- Improved penetration characteristics
- Reduced distortion
Torch and Tungsten Selection
Proper torch configuration is critical for root pass success:
Torch Selection:
Small to medium size (9 or 17 series) for access
Flexible head torches for pipe welding
Gas valve torches for remote control
Tungsten Electrode:
- Type: 2% thoriated (red) or 2% lanthanated (blue) for DC
- Diameter: 1/16" (1.6mm) for most applications
- 3/32" (2.4mm) for thicker materials
- Tip geometry: Sharp point for precise arc control
Gas Cup Selection:
Standard cups
#4 to #6 for most applications
Gas lens cups
Better coverage with lower flow
Large cups
For materials requiring extensive shielding
Shielding Gas and Back Purging
Gas management is crucial for root pass quality:
Primary Shielding Gas:
Argon
Standard for most applications (99.995% purity)
Argon-Helium mixtures
For increased penetration
Flow rate
15-25 CFH depending on cup size
Back Purging Requirements:
- Essential for stainless steel and reactive metals
- Prevents oxidation of root pass back side
- Produces silver-colored root surface
- Required for X-ray quality welds
Back Purging Setup:
- Seal pipe ends with tape or plugs
- Introduce argon through small holes or tubes
- Maintain slight positive pressure (2-5 CFH)
- Allow purge time before welding (2-5 minutes)
Open Root Welding Techniques
Joint Preparation and Fit-Up
Proper preparation is essential for open root welding:
Land Thickness:
Standard
1/16" (1.6mm) for most applications
Thin land
1/32" (0.8mm) for easier penetration
Heavy wall
Up to 3/32" (2.4mm) for thick materials
Root Opening:
Standard
1/16" to 3/32" (1.6-2.4mm)
Tight
1/32" (0.8mm) for skilled welders
Wide
Up to 1/8" (3.2mm) for easier penetration
Bevel Angle:
Standard
37.5 degrees (75 degree included angle)
Narrow
30 degrees for thin materials
Wide
45 degrees for thick materials
Fit-Up Quality:
- Uniform gap along entire joint
- Proper alignment (no mismatch)
- Clean surfaces free of contamination
- Tack welds properly placed and cleaned
Keyhole Welding Technique
The keyhole technique is the standard method for open root TIG welding:
Keyhole Formation:
- Direct arc force opens a small hole at the root
- Molten metal flows around the keyhole
- Surface tension holds the molten pool in place
- Keyhole size indicates penetration depth
Technique Execution:
- Establish the arc on the joint
- Increase amperage until keyhole forms
- Maintain consistent keyhole size
- Add filler metal to the leading edge
- Progress steadily along the joint
- Reduce amperage when terminating
Keyhole Size Control:
Too small
Insufficient penetration
Optimal
1/16" to 3/32" diameter
Too large
Risk of burn-through
Amperage Adjustment:
- Start with recommended amperage for thickness
- Increase until keyhole forms
- Adjust to maintain consistent keyhole
- Reduce for tie-ins and terminations
Filler Metal Addition
Proper filler addition is critical for root pass quality:
Filler Rod Size:
Match or slightly smaller than base metal thickness
Common sizes
1/16" (1.6mm) and 3/32" (2.4mm)
Smaller rods for thin materials
Addition Technique:
- Add to the leading edge of the pool
- Dip quickly and withdraw
- Maintain consistent addition rate
- Don't let rod touch the tungsten
Addition Rate:
- Match filler addition to travel speed
- More filler for wider gaps
- Less filler for tight joints
- Adjust based on bead profile
Filler Rod Angle:
- 15-20 degrees from work surface
- Point toward the leading edge
- Keep within the gas shield
- Avoid touching the sides
Back Purging Techniques
When Back Purging is Required
Back purging is essential in many applications:
Required Applications:
- All stainless steel pipe welding
- Titanium and reactive metals
- High-purity systems (food, pharmaceutical)
- Nuclear and aerospace applications
- X-ray quality requirements
Benefits:
- Prevents oxidation (sugaring)
- Produces silver-colored root
- Improves corrosion resistance
- Ensures X-ray quality
- Eliminates root grinding
Back Purging Setup Procedures
Proper setup ensures effective purging:
Sealing Methods:
- Water-soluble paper dams
- Rubber or foam plugs
- Tape seals
- Mechanical clamps
Gas Introduction:
- Small holes in pipe or dams
- Diffuser tubes for even distribution
- Multiple inlet points for large pipes
- Flow measurement and control
Purge Volume Calculation:
- Calculate pipe volume: π × r² × length
- Allow 5-10 volume changes for complete purge
- Typical purge time: 2-5 minutes
- Verify with oxygen analyzer if available
Purge Monitoring:
- Visual inspection of gas flow
- Oxygen analyzers for critical applications
- Bubble test at outlet
- Weld color verification
Back Purging Best Practices
Flow Rate Control:
- Maintain slight positive pressure
- Typical flow: 2-5 CFH for small pipes
- Higher flow for large diameter pipes
- Avoid excessive flow that causes turbulence
Purge Maintenance:
- Maintain purge throughout welding
- Continue for 30-60 seconds after completion
- Monitor for seal integrity
- Replenish gas as needed
Troubleshooting:
- Dark root color: Increase purge flow
- Inconsistent color: Check for leaks
- Porosity: Verify gas purity
- Oxidation: Extend purge time
Position-Specific Root Pass Techniques
Flat Position Root Passes (1G)
Flat position provides the best conditions for root passes:
Advantages:
- Optimal visibility
- Gravity assists pool control
- Easier keyhole maintenance
- Better for learning
Technique:
- Standard keyhole technique
- Moderate amperage
- Steady travel speed
- Consistent filler addition
Applications:
- Plate welding with positioners
- Pipe rotated on positioner
- Shop fabrication
- Training and practice
Horizontal Position Root Passes (2G)
Horizontal root passes require technique modifications:
Challenges:
- Gravity pulls pool downward
- Asymmetric bead formation
- Undercut on upper side
- Excessive buildup on lower side
Technique Modifications:
- Point torch slightly upward
- Add more filler to upper side
- Use slightly lower amperage
- Maintain smaller keyhole
Applications:
- Vertical pipe welding
- Plate welding in position
- Structural applications
- Code qualification tests
Vertical Position Root Passes (3G)
Vertical root passes are challenging due to gravity effects:
Uphill Technique:
- Use lower amperage than flat
- Small, controlled keyhole
- Slower travel speed
- Careful filler addition
- Weave slightly if needed
Downhill Technique:
- Higher amperage than uphill
- Faster travel speed
- Continuous filler addition
- Maintain tight arc
- Watch for lack of fusion
Applications:
- Vertical pipe welding
- Plate welding
- Construction applications
- Field welding
Overhead Position Root Passes (4G/5G/6G)
Overhead root passes are the most challenging:
Challenges:
- Gravity pulls metal downward
- Limited visibility
- Risk of drop-through
- Fatigue from position
Technique:
- Lowest amperage possible
- Small, fluid keyhole
- Steady, moderate speed
- Minimal filler addition
- Tight arc length
Applications:
- Pipe welding (5G, 6G positions)
- Overhead plate welding
- Field construction
- Code qualification tests
Root Pass Inspection and Quality Control
Visual Inspection Criteria
Visual inspection is the first quality check:
Acceptable Appearance:
- Uniform bead width
- Slight convexity acceptable
- No cracks or visible defects
- Silver or light straw color (stainless)
- Complete penetration visible
Rejectable Defects:
- Cracks of any size
- Lack of penetration
- Excessive concavity
- Undercut
- Porosity
- Oxidation (sugaring)
Penetration Verification
Verifying complete penetration is critical:
Visual Verification:
- Look for light through the joint
- Check root reinforcement
- Verify bead appearance on back side
- Confirm uniform penetration
Mechanical Testing:
- Bend tests (guided or free)
- Nick-break tests
- Tensile tests
- Macro-etch examination
Non-Destructive Testing:
- Radiographic testing (X-ray)
- Ultrasonic testing
- Dye penetrant testing
- Magnetic particle testing
Common Root Pass Defects
Lack of Penetration:
Cause
Insufficient heat, fast travel, tight fit-up
Prevention
Increase amperage, slow down, open gap
Repair
Remove and re-weld
Incomplete Fusion:
Cause
Insufficient heat, improper angle, fast travel
Prevention
Adjust technique, increase heat input
Repair
Grind and re-weld
Porosity:
Cause
Contamination, moisture, inadequate purge
Prevention
Clean materials, check gas, improve purge
Repair
Grind out and re-weld
Cracking:
Cause
Excessive restraint, rapid cooling, contamination
Prevention
Preheat, control cooling, clean thoroughly
Repair
Remove entire defect plus 1/8" minimum
Oxidation (Sugaring):
Cause
Inadequate back purge, contamination
Prevention
Improve purge, clean materials
Repair
Grind out and re-weld with proper purge
Advanced Root Pass Techniques
Pulse Welding for Root Passes
Pulse welding offers significant advantages for root passes:
Benefits:
- Reduced heat input
- Better penetration control
- Reduced burn-through risk
- Improved bead appearance
- Less distortion
Parameter Selection:
- Peak amperage: 1.5-2.0 times background
- Background amperage: 25-30% of peak
- Frequency: 1-2 Hz for manual welding
- Balance: 40-50% peak time
Technique:
- Establish arc with peak amperage
- Maintain keyhole during peak periods
- Allow pool to solidify during background
- Add filler during peak periods
- Progress forward with each pulse
Hot Wire TIG for Root Passes
Hot wire TIG increases deposition rates:
Process Description:
- Filler wire is resistance-heated before entering pool
- Increases deposition rate significantly
- Reduces heat input requirement
- Improves penetration
Applications:
- Thick wall pipe
- High-production welding
- Automated systems
- Cladding and overlay
Equipment Requirements:
- Hot wire power supply
- Wire feeder with preheat
- Specialized torches
- Process controls
Orbital TIG Welding
Orbital welding produces consistent root passes:
Advantages:
- Consistent quality
- Repeatable results
- No operator skill variation
- Excellent for production
Applications:
- Tube welding
- Pipe welding
- High-purity systems
- Nuclear applications
Process:
- Torch rotates around workpiece
- Parameters precisely controlled
- Consistent travel speed
- Uniform heat input
Industry-Specific Root Pass Requirements
Pipeline Welding (API 1104)
Pipeline welding has specific root pass requirements:
Requirements:
- Complete penetration
- Uniform reinforcement
- No defects
- 100% radiographic inspection
Common Techniques:
Cellulosic SMAW for root (conventional)
TIG root with hot pass
Combination procedures
TIG Root Pass:
- Increasingly used for critical lines
- Requires back purging
- Produces superior quality
- Higher initial cost, lower repair rate
Pressure Vessel Welding (ASME Section VIII)
Pressure vessels require high-quality root passes:
Requirements:
- Complete joint penetration
- Full fusion
- No cracks or defects
- Radiographic or ultrasonic inspection
Techniques:
- TIG root common for stainless steel
- Backing bars allowed for some applications
- Back gouging for double-sided welds
- PWHT may be required
Nuclear Welding (ASME Section III)
Nuclear applications have the most stringent requirements:
Requirements:
-
Training and Skill Development
Progressive Learning Approach
Develop root pass skills systematically:
Stage 1 - Flat Position Practice:
- Practice on plate with open root
- Learn keyhole formation and control
- Develop consistent technique
- Master filler addition
Stage 2 - Back Purging:
- Practice purging techniques
- Learn setup procedures
- Verify purge effectiveness
- Understand oxidation prevention
Stage 3 - Pipe Welding:
- Start with 1G rotated position
- Progress to 2G horizontal
- Master 5G fixed position
- Attempt 6G position
Stage 4 - Code Qualification:
- Practice test conditions
- Learn inspection criteria
- Understand defect prevention
- Prepare for certification
Practice Exercises
Keyhole Control Exercise:
- Weld on open root plate
- Practice forming and maintaining keyhole
- Vary amperage to see effects
- Develop feel for optimal size
Filler Addition Exercise:
- Practice consistent filler addition
- Vary addition rate and observe results
- Learn to match travel speed
- Develop rhythm
Position Welding Exercise:
- Practice root passes in all positions
- Start with flat, progress to overhead
- Use pipe for 5G and 6G practice
- Focus on pool control