Introduction: The Power of Plasma Cutting
Plasma cutting is one of the biggest advances in metal fabrication, giving beginners and professionals a fast, precise way to cut conductive metals like steel, stainless, and aluminum. By using a high-velocity jet of ionized gas, plasma systems can cut efficiently while keeping setup relatively accessible for home shops.
This guide explains the fundamentals of plasma cutting, including how the process works, how to choose equipment, core setup and operating steps, and the safety practices needed to make clean cuts with confidence.
Consistent cut quality comes from three basics: correct setup, steady torch control, and disciplined consumable and air-system maintenance.
How Plasma Cutting Works
The Plasma Process
- Compressed gas flows through the torch.
- A high-voltage start ionizes the gas into plasma.
- Electrical current flows through the conductive arc.
- The arc heats to roughly 30,000-40,000°F.
- Metal at the cut line melts, then is blown away by gas flow.
Core System Components
Power Supply
Converts input power to DC cutting current and determines output amperage and duty cycle.
Torch Assembly
Holds the electrode, nozzle, swirl ring, and shield cup while controlling arc and gas flow.
Gas Supply
Usually clean, dry compressed air at regulated pressure; gas quality directly affects consumable life.
Ground Clamp
Completes the electrical circuit and must connect to clean metal close to the cutting zone.
Essential Safety Equipment
PPE Checklist
- Eye protection: Shade 5-8 cutting lens, plus safety glasses underneath.
- Respiratory protection: N95 minimum, P100 or PAPR for frequent cutting.
- Body protection: Flame-resistant long sleeves, gloves, and leather boots.
- Hearing protection: Ear plugs or muffs; plasma cutting commonly reaches 85-100 dB.
Fire and Fume Safety
Keep combustibles at least 35 feet from cutting areas, maintain ready fire suppression, and ensure strong ventilation or source extraction so fumes are pulled away from the operator.
Never cut in wet conditions and never run with damaged cables or poor grounding. Electrical shock and fire risks increase dramatically when setup discipline is ignored.
Setup and Pre-Cut Preparation
Installation Basics
- Verify voltage, circuit size, and grounding before powering the unit.
- Set air supply to manufacturer requirements (often 60-90 PSI) with filtration and water separation.
- Organize cables and work leads to avoid trip hazards and accidental torch drag.
- Prepare a stable, fire-safe cutting surface with clear access around the workpiece.
Before-You-Cut Checklist
- Clean rust, paint, oil, and moisture from the cut path.
- Secure and mark the workpiece.
- Inspect electrode, nozzle, and swirl ring condition.
- Confirm air pressure, amperage, and trigger operation.
- Attach the ground clamp to clean metal and test arc start on scrap.
Basic Cutting Technique
Arc Start and Torch Position
Hold the torch near perpendicular to the workpiece, keep a consistent standoff around 1/8"-3/16", and begin travel only after the arc fully penetrates the material.
Travel Speed and Angle Control
- Sparks should trail slightly behind the cut (about 15-30 degrees).
- Too slow causes excess dross and a wider kerf.
- Too fast causes incomplete cuts and increased bevel.
- Maintain consistent movement and avoid excessive torch tilt.
Cut Quality Signals
Good Cut
Smooth edge, narrow kerf, minimal bevel, and light dross that removes easily.
Poor Cut
Ragged edge, heavy dross, wide kerf, and visible bevel from setup or technique errors.
Material and Equipment Selection
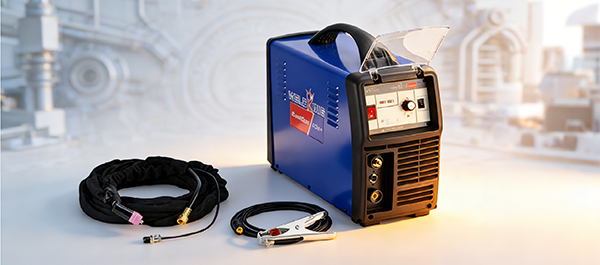
Choosing the Right Machine
Select a plasma cutter by rated cut thickness (not only sever thickness), power input requirements, duty cycle, and whether you need portability or shop-level capacity.
| System Class | Typical Rated Cut | Best Fit |
|---|---|---|
| Light Duty | 1/4 in | DIY repair and light fabrication |
| Medium Duty | 1/2 in | Home shop and regular small production |
| Heavy Duty | 3/4 in+ | Industrial fabrication and thick materials |
Material Notes
Mild steel usually delivers the easiest, cleanest cuts. Stainless and aluminum cut well too, but each may require tuning amperage, gas choice, and speed to reduce dross and distortion.
Troubleshooting and Maintenance
Common Problems
- Excessive dross: Increase travel speed or amperage.
- Hard starts: Replace worn electrode and clean surface contamination.
- Arc instability: Reduce standoff and verify air pressure and ground quality.
- Rapid consumable wear: Improve air dryness and verify proper part installation.
Maintenance Rhythm
Inspect consumables daily, service air filtration weekly, and perform deeper torch/system checks monthly. Planned maintenance dramatically improves cut consistency and lowers operating costs.
Beginner Progression and Skill Building
Start with straight cuts on scrap, then move to circles, shape templates, and edge starts before practicing pierce starts and bevel work. As confidence grows, add guides or CNC workflows for repeatability and precision.
Document your preferred settings by material thickness. Building your own process sheet shortens setup time and helps produce repeatable quality on future projects.
Conclusion
Plasma cutting combines speed, versatility, and approachable learning for new fabricators. With the right machine selection, safe setup, and disciplined torch technique, you can produce clean professional results across a wide range of projects.
Clean, dry air ✓ Correct consumables ✓ Solid grounding ✓ Stable standoff ✓ Consistent travel speed ✓